
Apply tax amount to products and assign each tax category to your shipping zone. Here are the steps of applying tax category.
Tax Category Examples #
- To apply taxes, you need to create a tax category.
Please Note:
In a category that has a 14% tax rate, you can choose to apply this tax rate to specific shipping zones.
For example, if you’re delivering orders to Cairo and Giza with a tax rate of 14% and Alex with a tax rate of 24%, you will need to specify each tax to reflect on the right zone. - You can use the tax category if you ship outside Egypt.
For example, in the UK you would add a 20% tax rate e.g. you enter a product price of EGP 100 that includes EGP 20 tax. A customer in the UK would pay EGP 100 only.
Or in the UK you would add a 20% tax rate e.g. You enter a product price of EGP 100 that excludes EGP 20 tax. Thus, a customer in the UK would pay 100 plus EGP 20 for the order.
Steps to Create Tax Category #
- From your store dashboard, go to the navigation menu, click on “Store configuration”
- Then, click on “Payment” and “Tax categories”
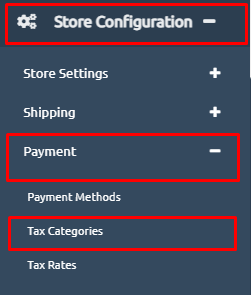
3. Click on “Create“.

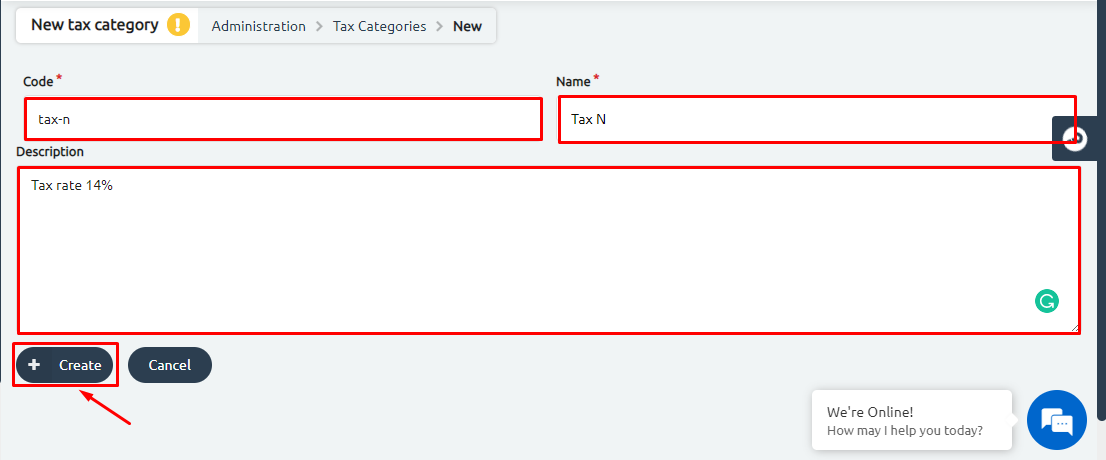
4. Start filling in the fields as shown in the below picture.
Please Note: type the code as “tax-store name of store initials”. Follow the demonstrated example: “tax-n”. Then, click on the “+Create” button.
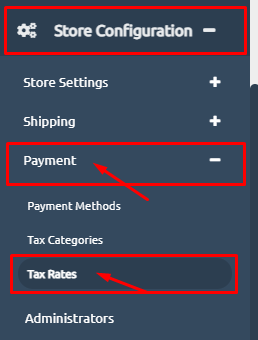
5. Head back to the “Store Configuration” and “Payment”.
6. Click on “Tax Rates”
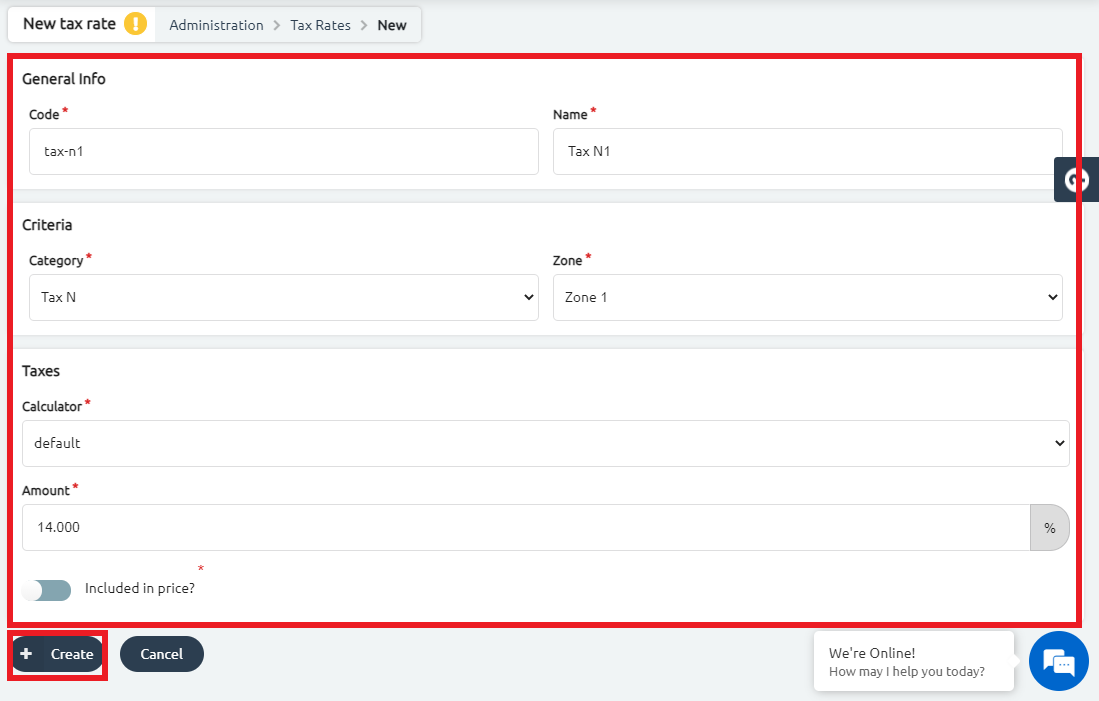
7. Choose the category you created for this tax, then choose the zone or areas you are going to deliver to that you want to apply this Tax rate to, for example, the UK zone. Then, add the taxes amount, for example, 20%.
8. On the checkout page, you will find the highlighted tax amount as demonstrated on the below page.
Please Note:
If you check the button included in the price then the taxes will be included in the product price in the total price of the product for the customer. For example, if a product price is EGP 100 inclusive of tax then a customer will pay a total of EGP 100.

9. If you don’t check the button, then the tax will appear as an additional amount that is added plus the product price. For example, if a product price is EGP 100 and tax is EGP 20, then the final price is EGP 120.

Assigning Tax Category To Product Manually #
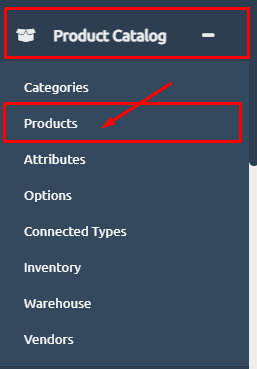
- Get back to the dashboard navigation menu, click on “Products“.
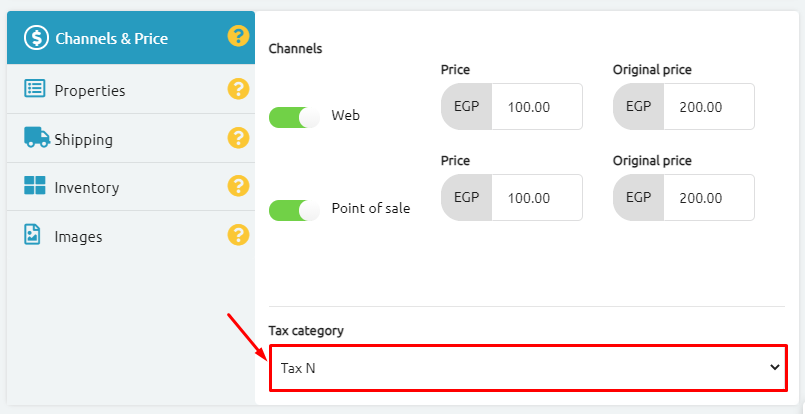
- To start applying this tax rate to products, then from the products page choose the product you want to apply taxes to or create a new product, and from the product’s settings, from channels and prices, add the tax category.
Steps to Apply Tax Category In Bulk #
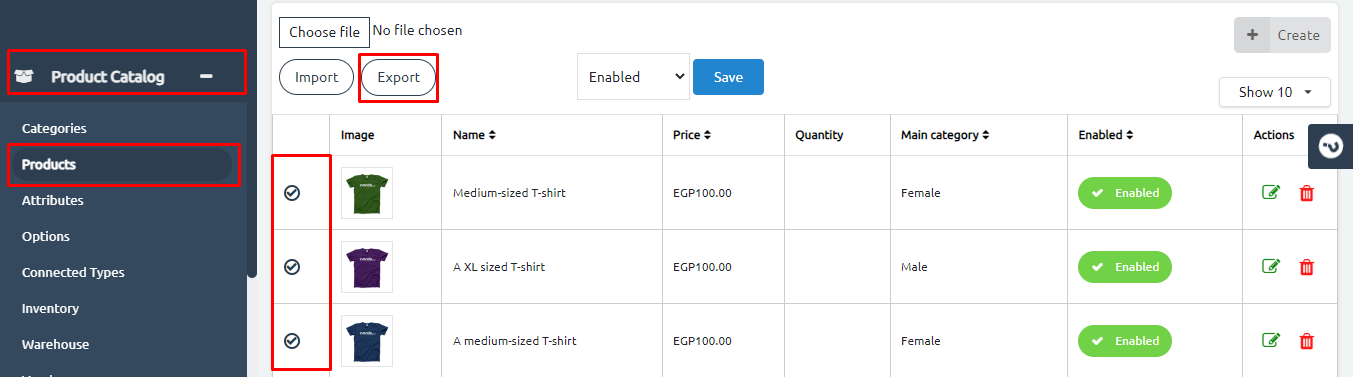
- From the dashboard, click on “Category Catalog” and then “Products”
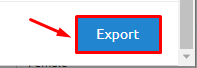
- Note: If you want to assign the tax on certain products, you can check on them and then press the “Export” button. As shown in the below picture.
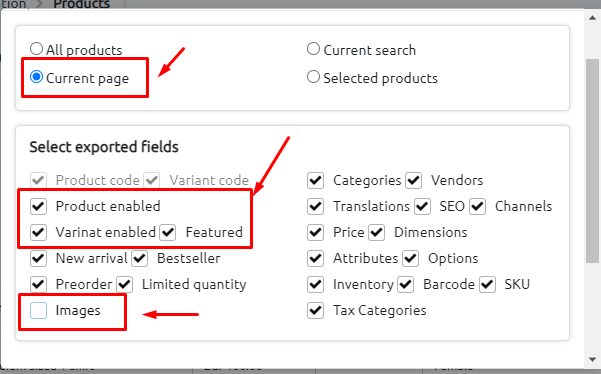
3. From the pop-up window that will appear, check on “Current Page“
4. Make sure you check on “Product Enabled” and “Variant Enables“
5. Unmark the “Image” to avoid any duplicated images.
4. Scroll down and click on the “Export” button. As shown in the below picture.
5. Open the downloaded sheet and scroll right to reach the last column, named “Tax-category“.
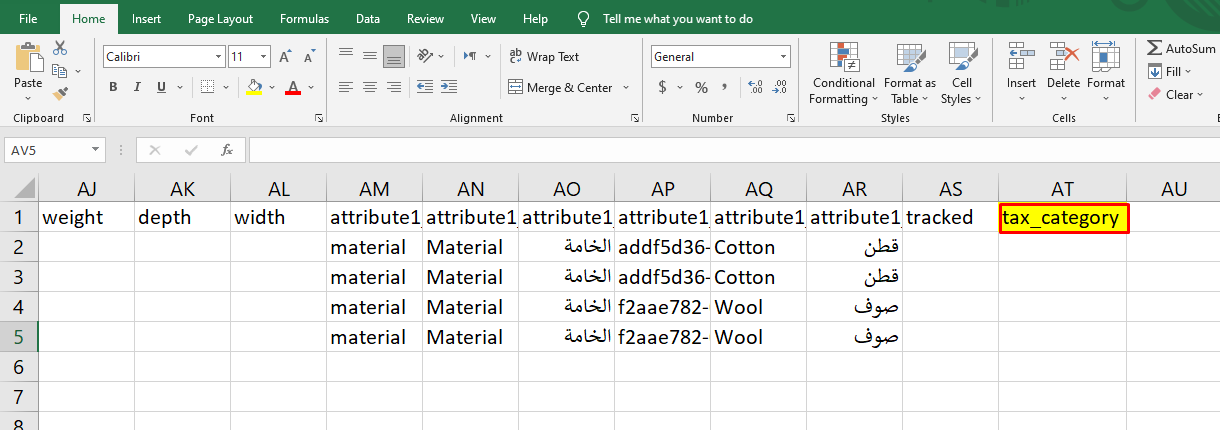
6. Type the “code” of the tax category you created earlier.
Then import the sheet following the below steps.
Steps to Import Bulk Sheet #
- From the dashboard navigation menu, click on “Choos File“.
- Select the excel file with the added tax in it.
- Click on “Import“.

Congrats, you created a tax category and applied it to your products.


