
Table of Contents
How to Assign the Created Options to the Product #
After creating options with detailed variants, you should assign the option you created to the product.
To know how to assign the created options please follow the below steps:
- Follow the same steps of creating a configurable product
- Fill in the required fields: Code, EN & AR Name, Description
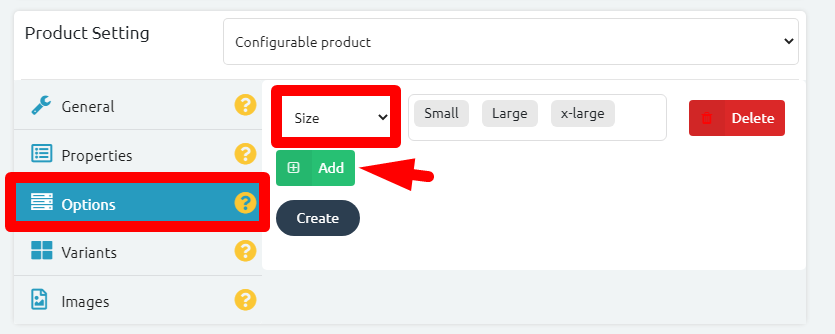
- Then scroll down to “Product Setting“
- Click on the “Add” button and choose the option from the drop-down menu as illustrated in the below picture.
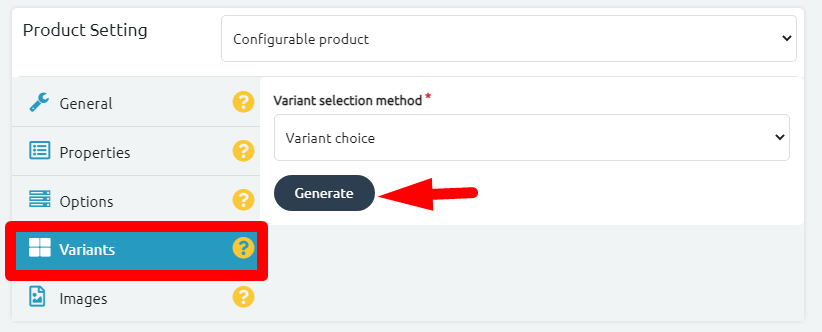
- Then Press on the “Variants” section.
- Click on “Generate“
- Start filling the required fields: Stock, Warehouse (default)
- Fill in the SKU field, then the Barcode field.
*Please Note: You can write the SKU and Barcode. - Write a variant “Code” that differs from the product code.
- Specify the price of this variant.
*Example: XXL sizes are higher than Small Sizes.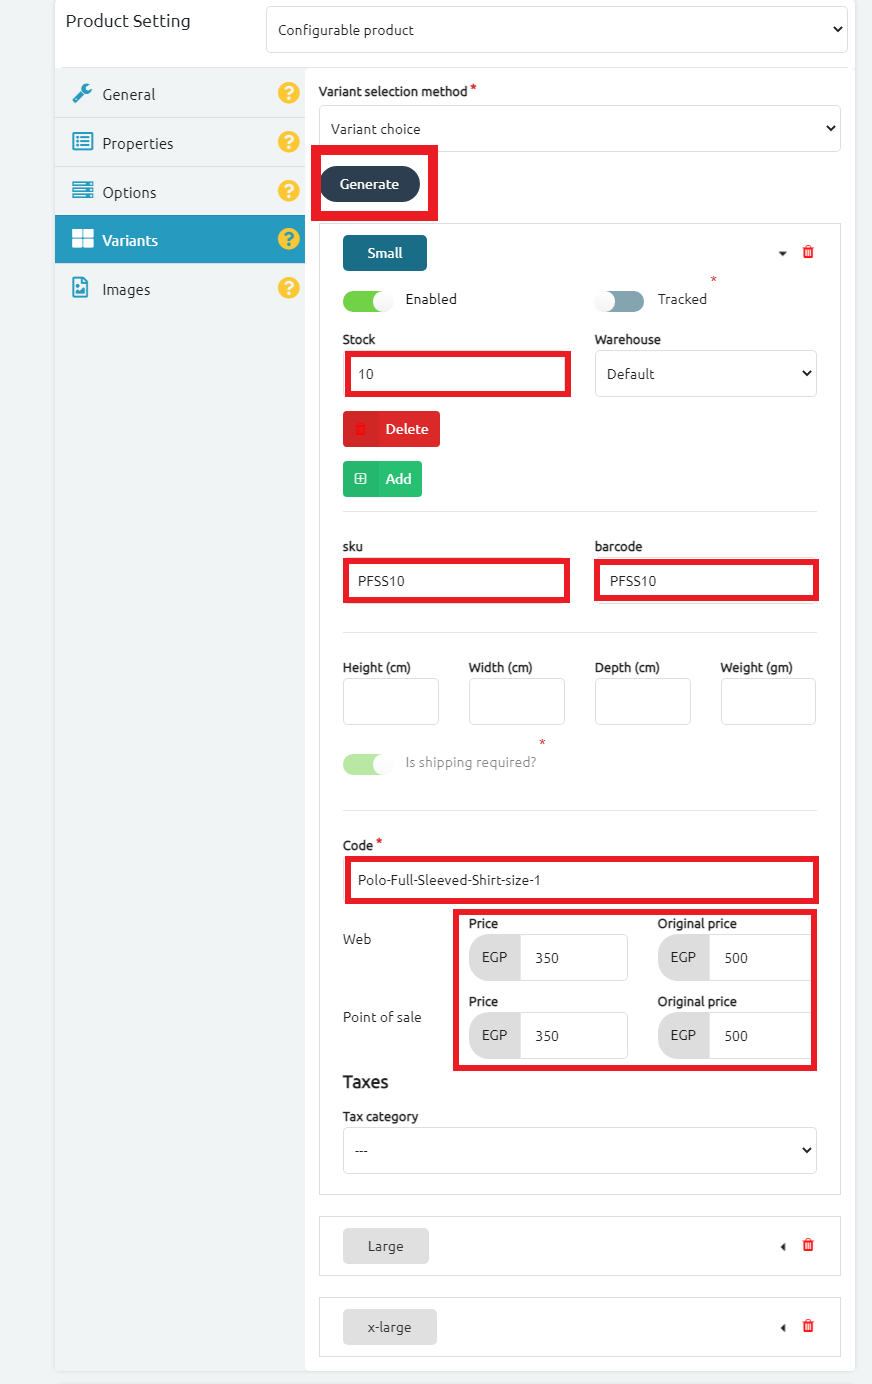
- Click on “Create” button.
- Check the successful message as shown in the below picture.
 Please Note: In case you will change the price of a variant, please don’t forget to scroll down and frequently press on “Save Changes”.
Now, you successfully created variants to your product option.


