What is Facebook Pixel?
The Facebook Pixel is a piece of code that you embed on your website to track conversions from Facebook advertisements, optimize ads, generate focused audiences for future ads, and retarget people who have previously interacted with your website.
How Does it Work?
Assume someone clicks on your link ad, visits your website, and purchases one of your products. That will cause the Facebook Pixel to be triggered and report the action that has just occurred. You’ll be able to see when a customer took action after seeing your Facebook ads, thanks to the Facebook Pixel. This way, you’ll be able to reach out to this consumer again utilizing a Custom Audience.
How Do You Link Your Facebook Pixel to zVendo Store?
Follow the below instruction to start linking your Facebook Pixel to your zVendo store. You don’t have Facebook Pixel set up? Follow instructions here to get started
- Log in to Facebook and go to your Ads Manager Account
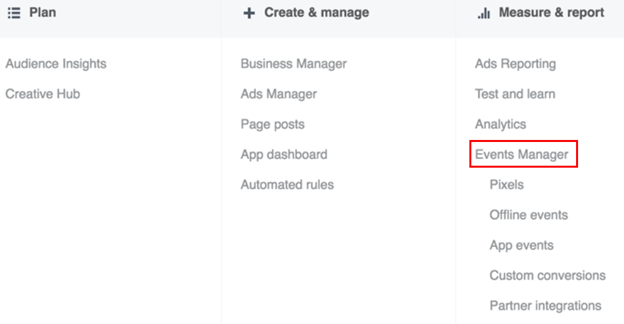
- Open navigation bar, and choose Event Manager
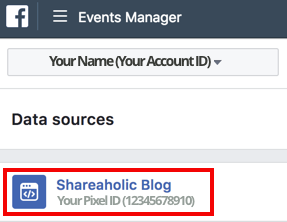
3. From underneath your site name, copy your Facebook Pixel ID
4. Now, Log in to your Dashboard
5. Select Store Configuration
6. Press Store Settings
7. Choose Store Identity

8. Once you click Store Identity, Scroll down to the Analytics column
9. In Analytics column, you will find the Facebook Pixel ID column
10. Paste your Facebook Pixel ID that you already have from your Facebook Pixel account

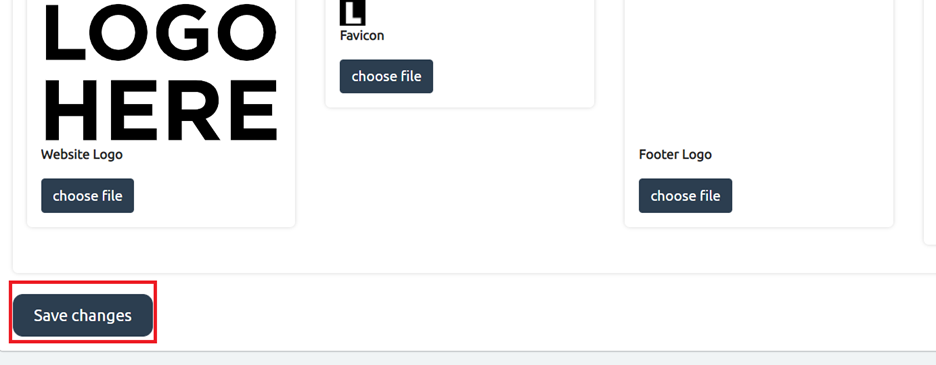
11. Scroll down and press Save Changes
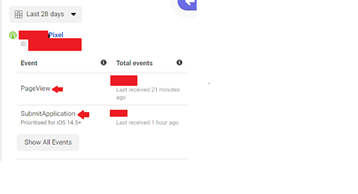
This is how data will be displayed on Facebook Pixel…
Congrats, Your Facebook Pixel is now linked to your store.


