
For a store owner, you might have a branch or multiple branches. Therefore, this article will help you add a store branch or more to your zVendo store.
How Do You Create a New Branch?
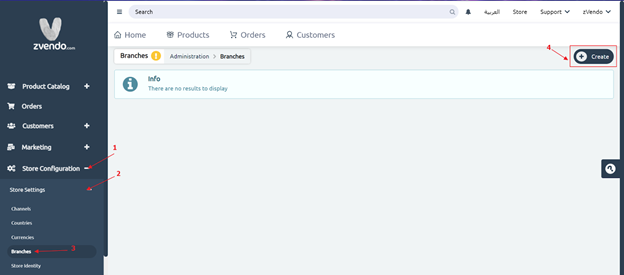
- Go to your Dashboard
- Press Store Configuration
- Click Store Settings
- Select Branches
- On the top right corner, Press Create
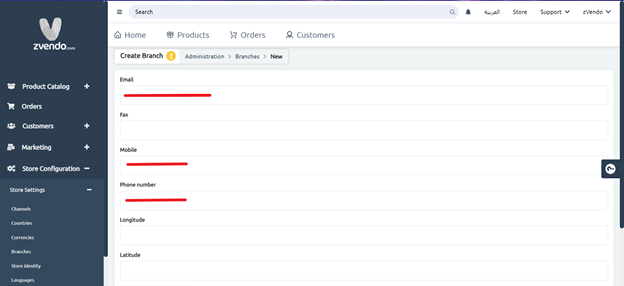
- Fill in the required information, Email> Fax> Mobile> Phone Number
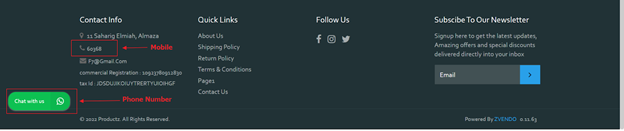
Note: Mobile Column is where you add the WhatsApp number. Phone Number will appear on your storefront footer
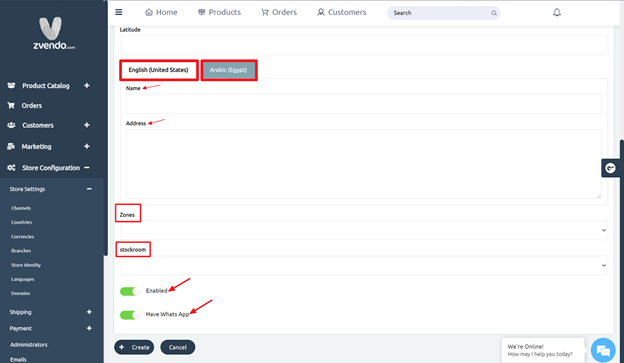
- Scroll down and in both Arabic& English, type store name> Address > Choose Zone> Stockroom
- Tick Enabled
- Activate “Have WhatsApp” if you would like to link this branch to the WhatsApp feature
- Press Create to save your new branch information
You can repeat the above steps to add as many branches as you need.
If you added multiple branches, you might need to enable branch selection to allow your customers to choose their nearest branch on the storefront.
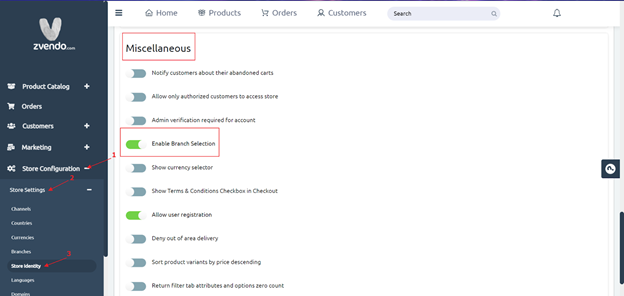
How Do You Enable Branch Selection?
- Login to your Dashboard
- Expand Store Configuration
- Click Store Identity
- On Store Identity, scroll down to Miscellaneous
- Tick Enable Branch Selection
- Scroll Down and press Save Changes
Voila!


