
Email Notifications #
Customize emails to which you send your customers in every step they take on your shopping journey at your online store.
You can notify them of the confirmed orders, keep them updated with orders’ shipping status, and on newsletter subscription.
zVendo automated email notifications also aid you to get notified when receiving new orders.
Steps to Customize Email Notifications
#
Add any notes on the email notifications sent to yourself as store admin and to your customers.
Follow the below steps:
- From your store dashboard, Click on “Store Configuration“
- Click on “Notification“
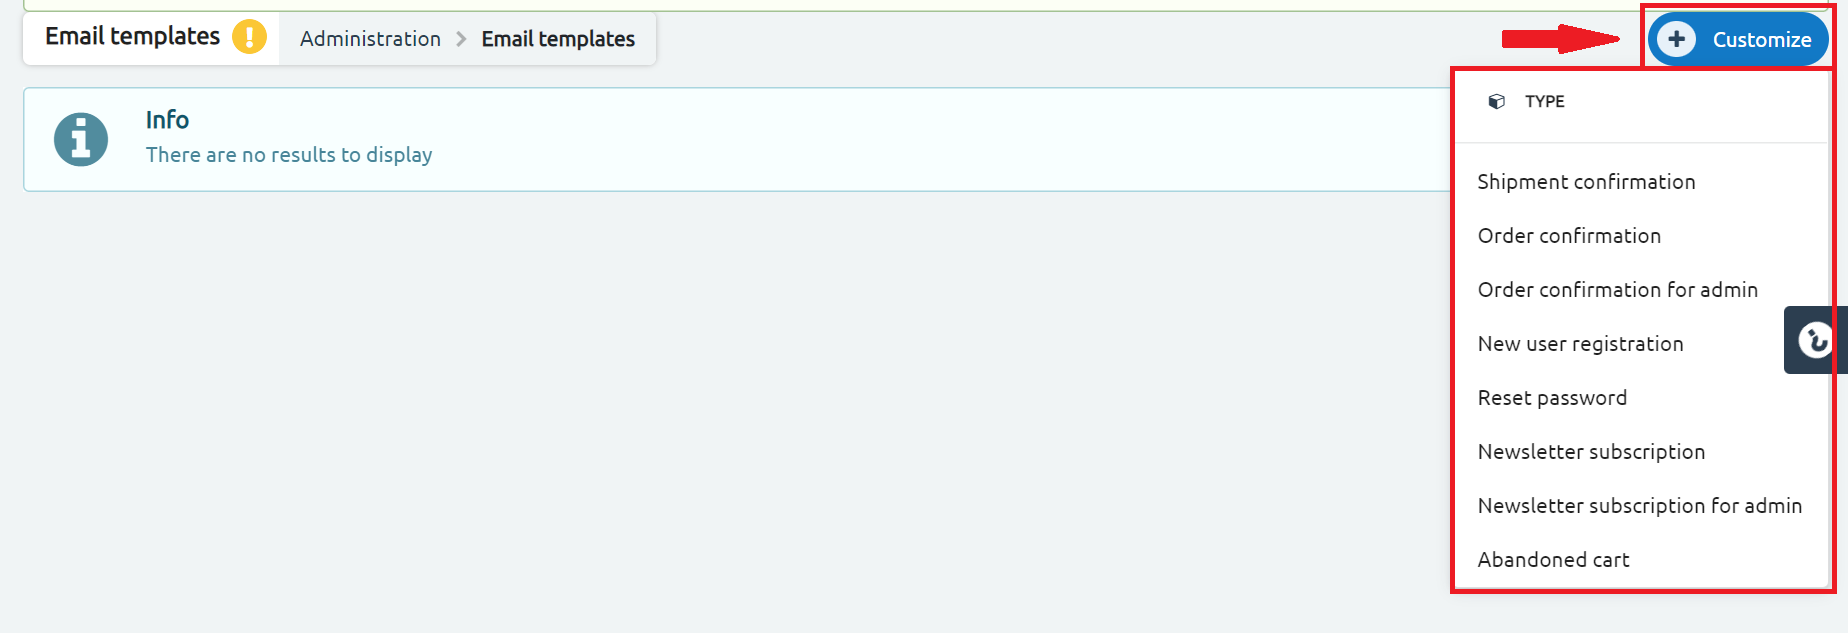
- Then, click on “Customize”

- Check the dropdown menu and choose the wished type of email notifications to start editing.
5. Type the email subject, and you will have a ready-made email. A demonstrated example is “Order Confirmation“.
6. Scroll down and you can add notes to your customers, like days of expected delivery or return policy notes, and then click again on the preview to make sure of the formatting.
Please note: All email templates are created in the traditional HTML/CSS formatting. This means that store owners with web development knowledge or who cooperate with external developers can edit or rebuild the entire email form to match the branding and policies.
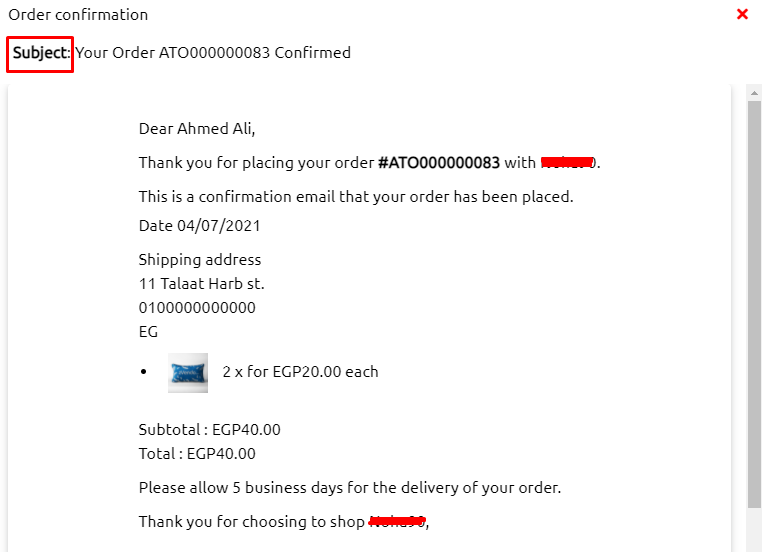
7. You can click on “Preview” highlighted in number 1 in the below picture.
8. Also, you can send yourself a test email by clicking on “Send Test Email” before you launch the edited version to your customers as highlighted in number 2.
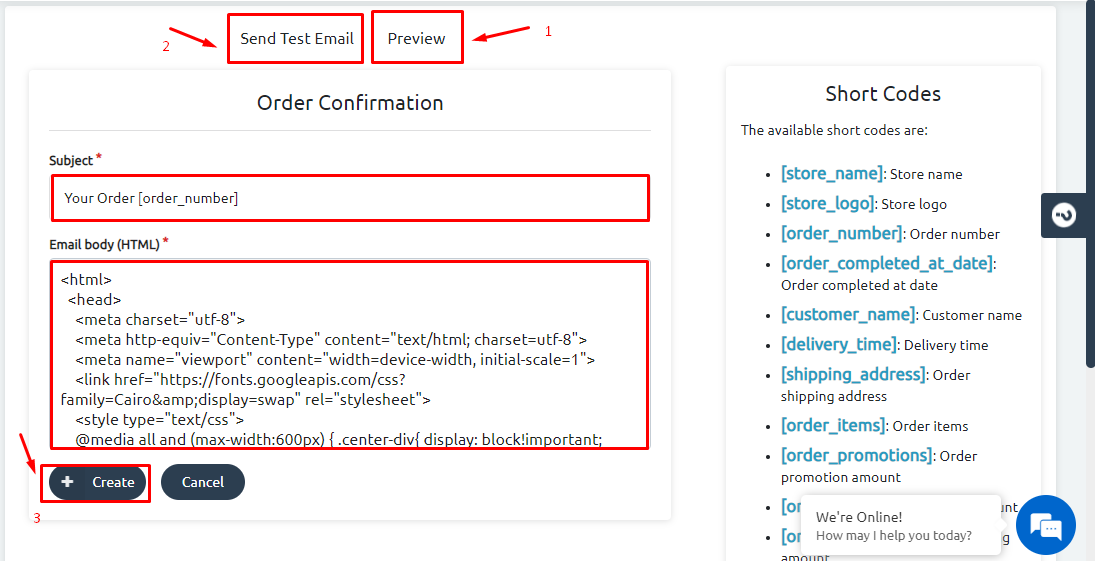
9. Using the shortcodes you can add the values you want to the email, for example, you can add this sentence to the email: Your order with the number [order_number] has been sent using [shipment_method], -The values [order_number], and [shipment_method] will appear like the following to the person reading the email: Your order with the number ATO000000083 has been sent using Aramex. You can check how it looks like from the preview button as shown below.
10. Using the same process, add all the shortcodes you want to sentences in the email body.
11. Click on “Create”
12. A confirmation message will appear as shown below.
Congrats, you customized your email notification successfully.


