
By adding multiple branches of your store you can decide which one to appear to your customer based on their location and you can decide which products to appear to your customer when they choose this branch address.
Steps to Connect Your Warehouse to Your Store #
- Firstly, you need to create a virtual warehouse that you can add your inventory.
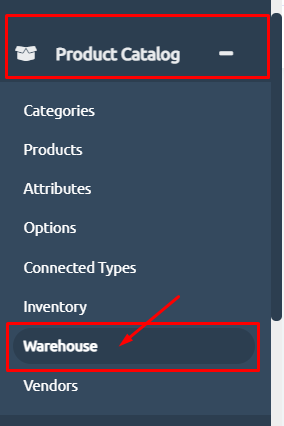
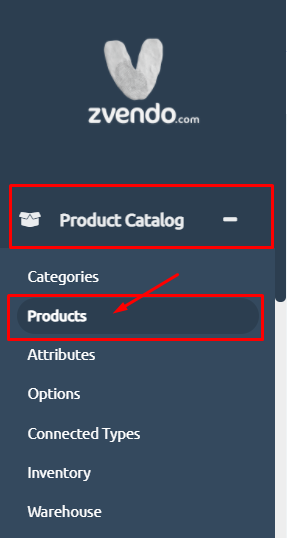
- Secondly, choose “Product Catalog” and “Warehouse”.
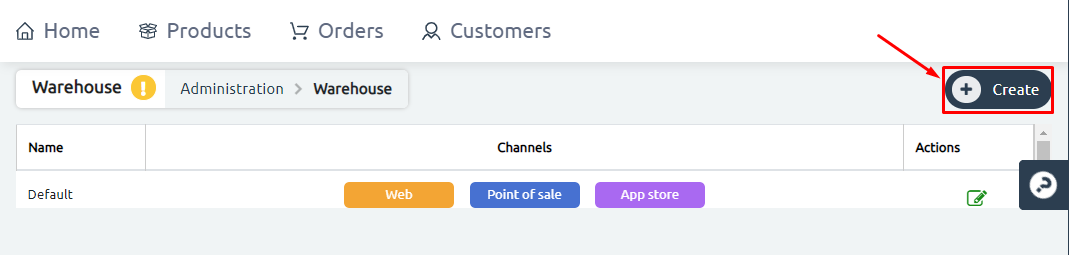
3. Then, click on “Create”
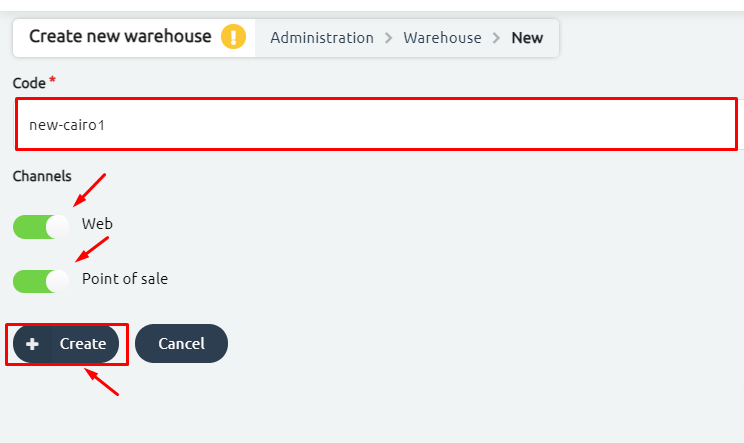
4. Write the “code” that represents your warehouse area. Code should be with no special character, no space.
*Example: Heliopolis-1 or new-cairo1
5. Check the channel -Web, Point of Sale, and App store– you want to assign the branch to.
6. Now, click on “Create”.
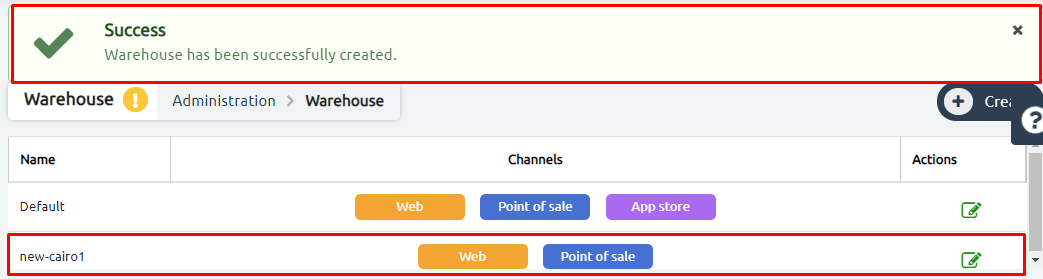
7. A successful message will appear at the top of the page.
8.Then, head to the navigation menu, click on “Product Catalog” and “Products” to add the inventory to the item.
Please note:
You need to add your inventory and connect your product and variants to this warehouse.
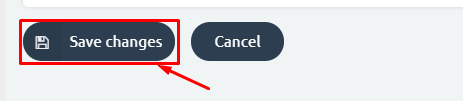
9. Select the item you wish to add to the inventory. Scroll down on the product page in the back-end and click on inventory as shown in the picture.

10. Click on “Save Changes” to save the changes.
Please Note:
You can assign your product to different warehouses with different stock in every warehouse, and ultimately every branch can have different stock from the same product.
Connect A Specific Zone to Your Warehouse #
- Then you should add your “Shipping Zones” to determine which “Zone” you will deliver to and then connect it to your branch, to know how to add your shipping zones, click here.
- Then you need to copy your branch address in the form of longitude and latitude coordinates, to do that open Google maps and type in your branch address in the search bar in the form of building number and street name or type the name of your store and select the branch address from the results.
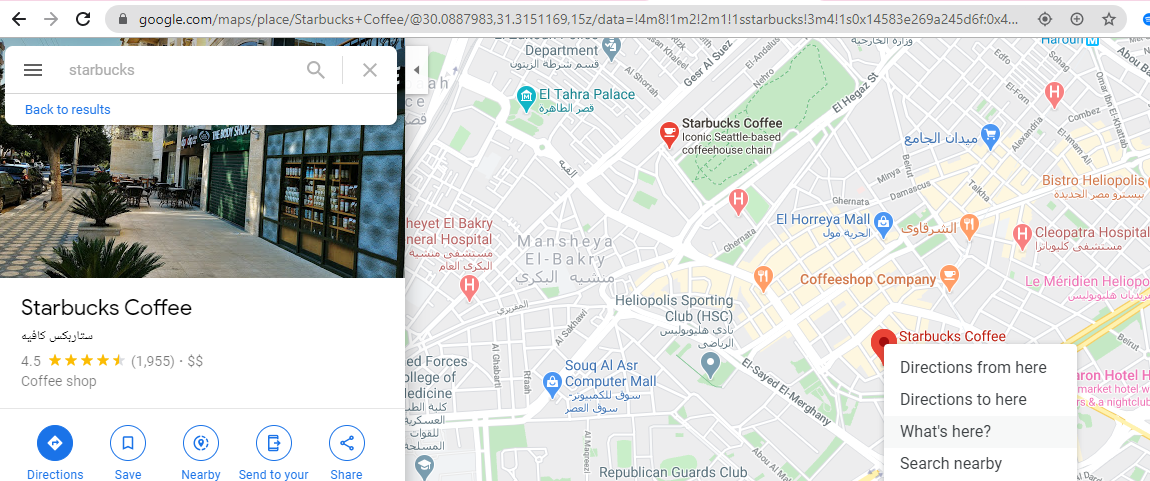
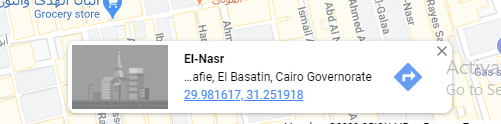
Then go to the red pin that appears, right-click on it then click on what’s here.
-You will find numbers that are your coordinates, the first few numbers before the coma are your latitude, and the second few after the coma are your longitude, copy both.
Steps To Assign Warehouse to Branches #
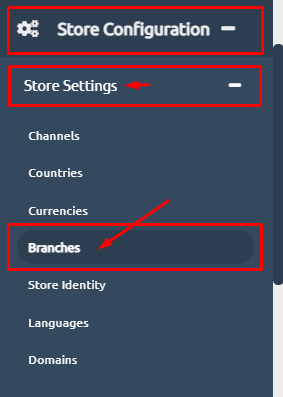
- The final step to do is to add your branches, go to “Store Configuration”
- Call “Branches”, then click on “Create”
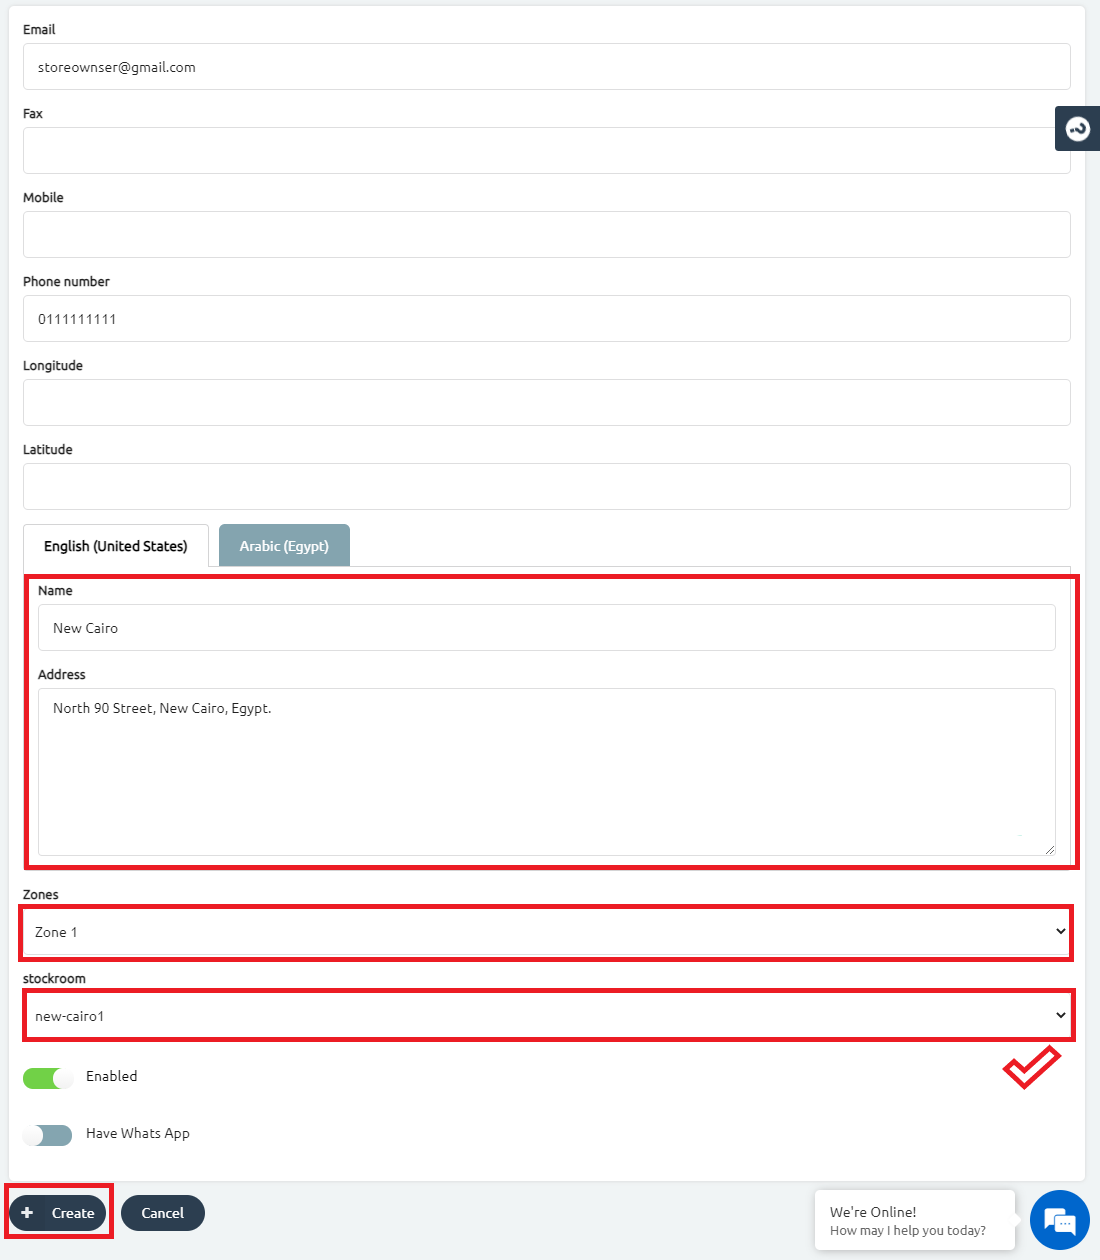
3. Then, start filling in your branch information and assign the warehouse you want to it. As shown in the below picture.
4. Click on the “Create” button at the bottom of the page.
Congrats, you now created a warehouse and assigned it to your branch.


