
Adding your products to your e-commerce store is a key step. Yet before that, you need to differentiate between two types of products; a simple product and a configurable product.
What’s a Simple Product? #
A simple product is a single item with no variants; no multiple colors, sizes, or flavors. A simple product cannot be customizable by customers, for instance, sandwiches with one size and no added flavors. Hence, if you want to add a product that doesn’t have any variants, choose a simple product.
Demonstrated below are the steps of creating simple products.
Steps to Add a Simple Product #
- From your store backend, click on “Product Catalog”, then click on “Products”.
- Now, click on the “Create” button and choose “Simple Product”. As shown in the below picture.

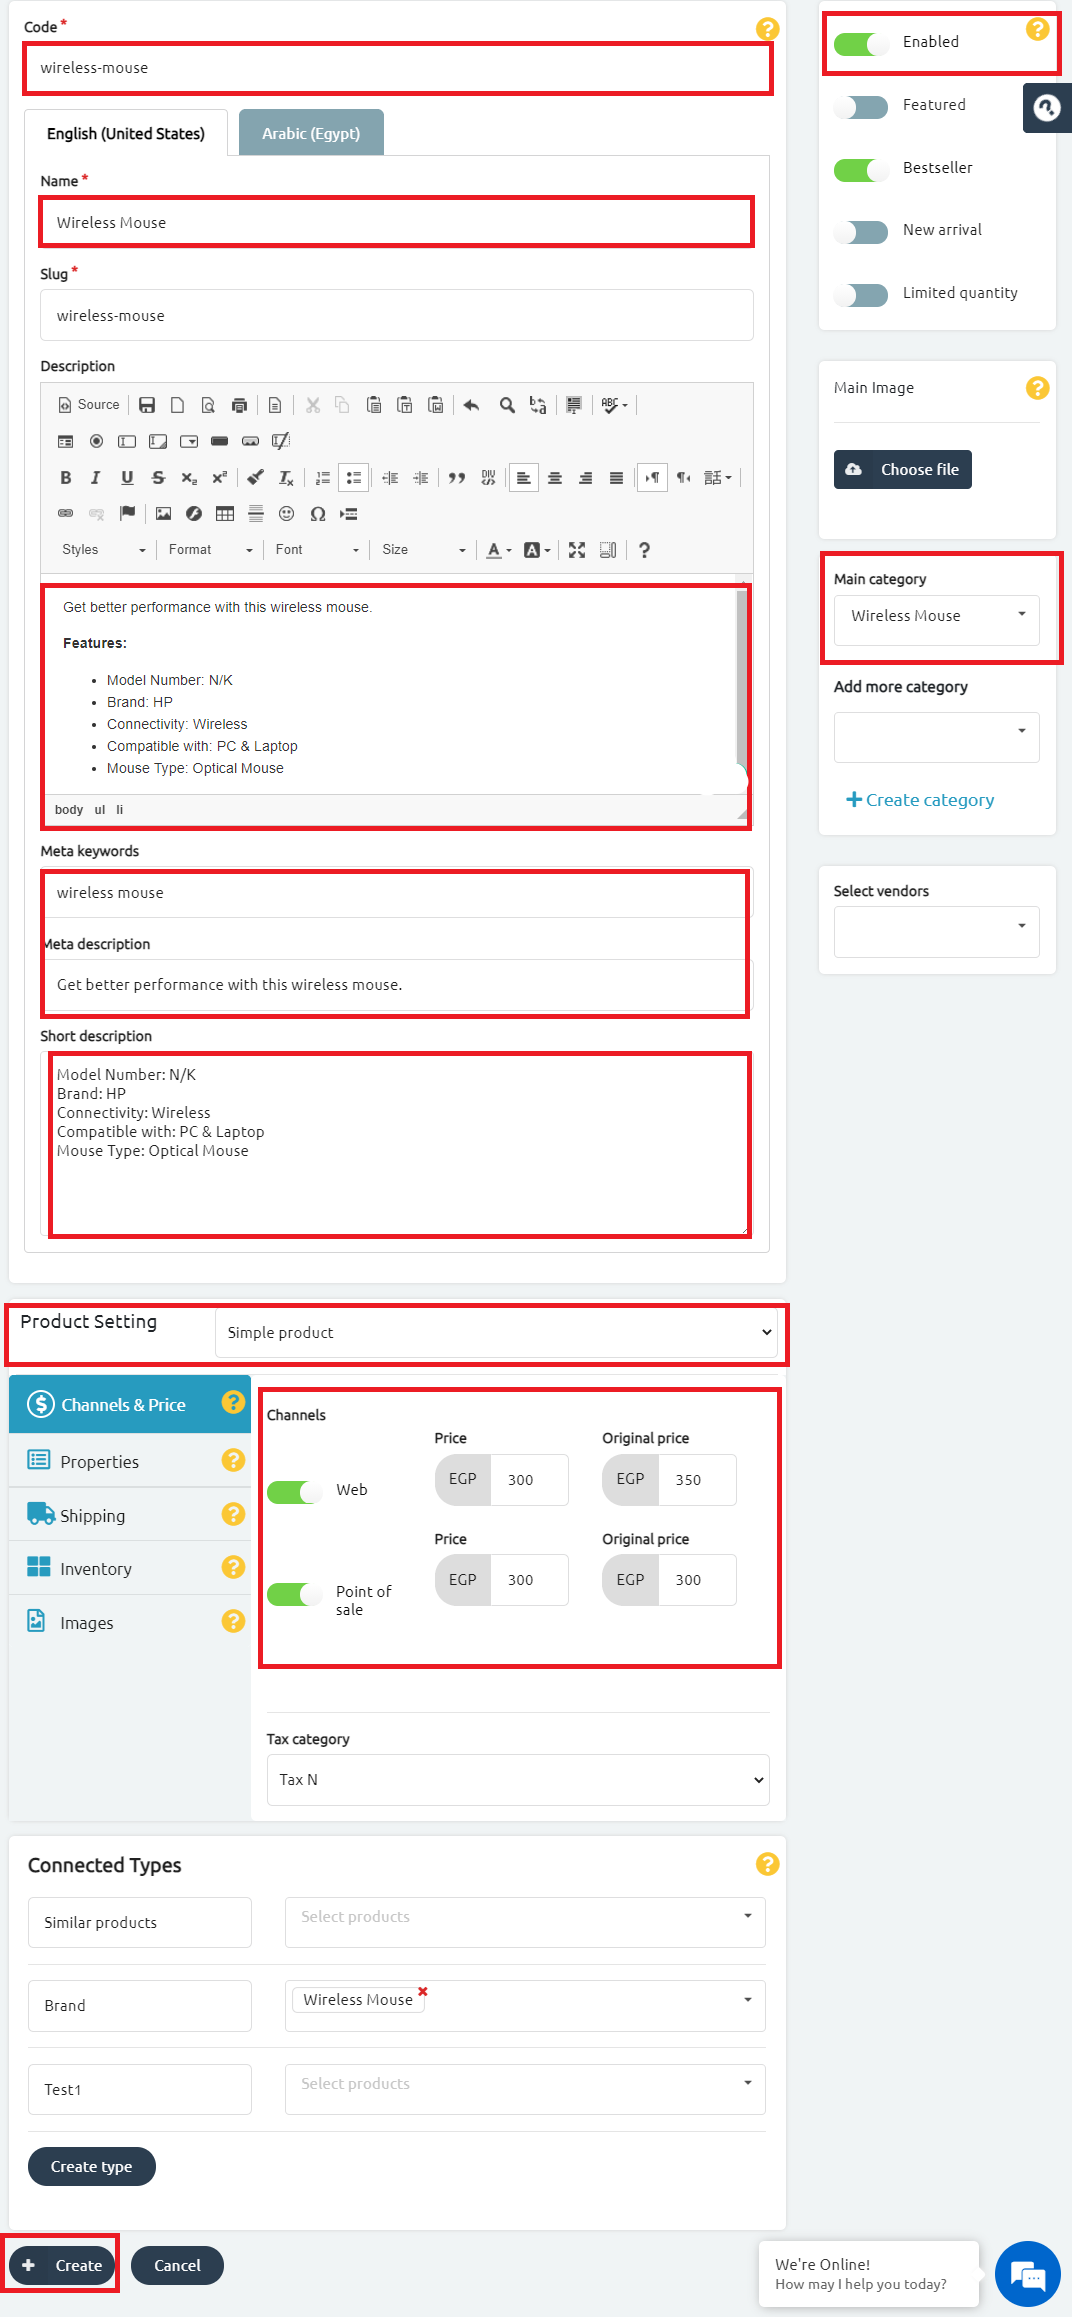
4. Start filling in the required details of the simple product: code, name, description, and meta keywords.
A holistic template preview of a simple product is illustrated in the below picture.
Detailed Information with Highlighted Notes #
- *Code: write the “code” of the first option and you type it with no special character, no space.
*Example: size-1 or color-1
- *Name: write the name of your product in English then fill in the name in Arabic
- *The “Slug” will be created automatically once you write the name.
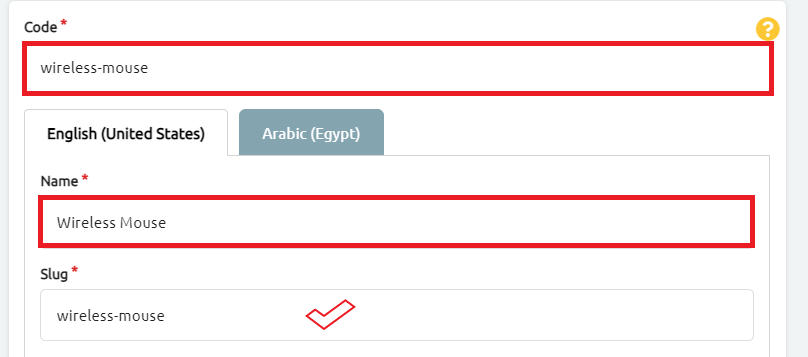
- You have to click on the “Enables” toggle button to make it visible in your store.
- Assign the “Main Category” that you already created earlier.
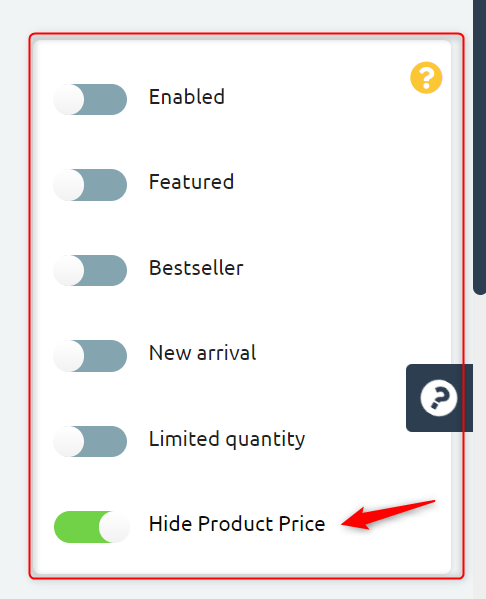
- Choose product Status as preferred, by checking the state you want from; featured, bestseller, preOrder, new, zero deposit, zero interest, another one for free, or limited quantity product.
- Add also product image from the right section as shown in the below picture.
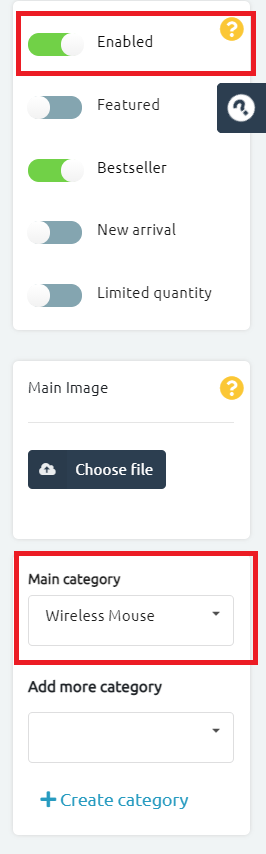
6. Write the detailed “Description” as shown in the below picture with an example.
Then, add product “Meta Description” and “Meta Keywords” by adding words that your customers will be able to see in search engine results, as perfecting your meta description is crucial for better search results.
Please Note:
*When filling the main fields, click on the “+Create” button at the bottom of the page frequently to save your simple product details.

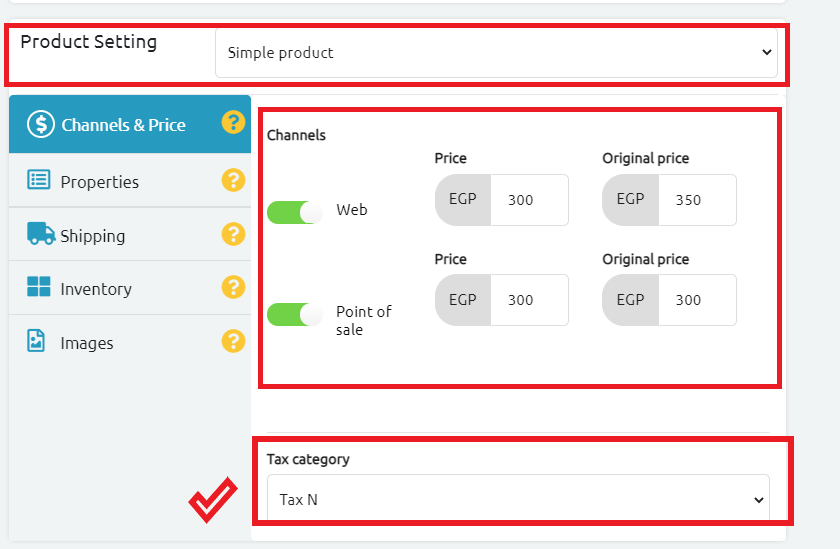
7. From the channels and prices tab, add product price, and if you want to show the product as one on discount, add original price and a new price underneath, and original price to be higher than the current price, if you want to add a discount percentage for customers that will pre-order this product, add this percentage under the prices, all this can be done from the upper part of the page.
Please Note:
Select the “Tax Category” to let the tax amount appear to your customers on the checkout page. To create a Tax Category, click here.
***Please Note***
On the rights side of the product’s page, you will see the “Hide product price” toggle Once you enable this toggle…
– Product will appear normally on the storefront, and you will be able to create a product without entering the price, and the system will handle setting the product price from the backend.
– Product price will be hidden on every channel that has been assigned for the product on the storefront.
– The “Add to cart” button on the storefront will be dimmed as the product cannot be added to the cart. – The quantity button (+ and -) will be dimmed on the storefront. The product CSV sheet will contain the “Hide product price” column which will accept (0,1) values
– If you enter 0 that means the product price and add to the cart will appear normally.
– If 1, then that means the hide price toggle is enabled so the price and add to cart will be hidden.
– When you export the product sheet, that column should be exported with 0 value for the products that have the hide price toggle disabled and 1 value for the products that have the hide price toggle Enabled.
***Please Note***
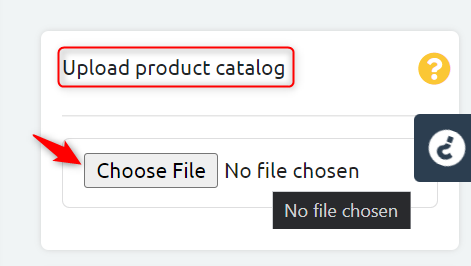
you can upload a pdf to the product so that it could appear on the storefront, and it will be available for end-users to download it.
-On the right side of the product page, you can view the “upload product catalog” section from where they can choose Max 5 MB file to upload. If you try to upload a file’s size that exceeds 5 MB, the system will show an error “file size cannot exceed 5 MB”
-Once you choose the preferred file, the file name will automatically appear.
-you will also see a delete button to replace the file when needed
8. From properties, assign product attributes or characteristics, which will make an easier experience for the customer to find and purchase your product by appearing in search results, for example, you can create attributes named “material” then add values as “cotton“, or named after a specific ingredient of your product.
9. Assign shipping, and enter product vital information for shipping requirements, like width, height, weight, add taxes if required, by choosing a tax category.
10. Access inventory, and choose if you want to track stock/inventory of this product so you can know when it’s close to running out of stock by checking that button, and you will be able to enter your current stock of the variant in your warehouse or storage house, for example, if you have 12 items of this product variant, enter 12 in the stock tab.

11. Repeat these steps on the Arabic fields.
12. Click on associations/connected types, and choose products you would want to connect to your current product to appear to customers as connected products.
13. Click on Create.
Now, you’re all set.


