
Table of Contents
Get more data analytics about your customers when adding a Facebook pixel to your e-commerce store!
Steps on Facebook Manager #
*Please Note:
Make sure you log in to your Facebook account and you can get back to this article to follow the steps as listed by Facebook or follow the below steps.
- Go to Facebook Events Manager.
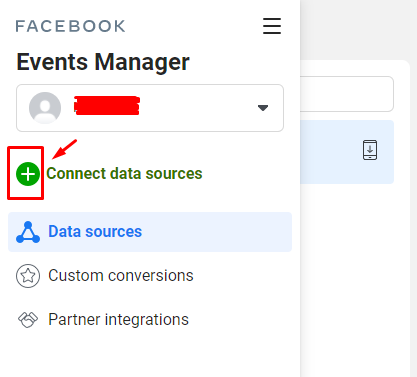
2. Click on “Connect Data Sources” and select “Web”.
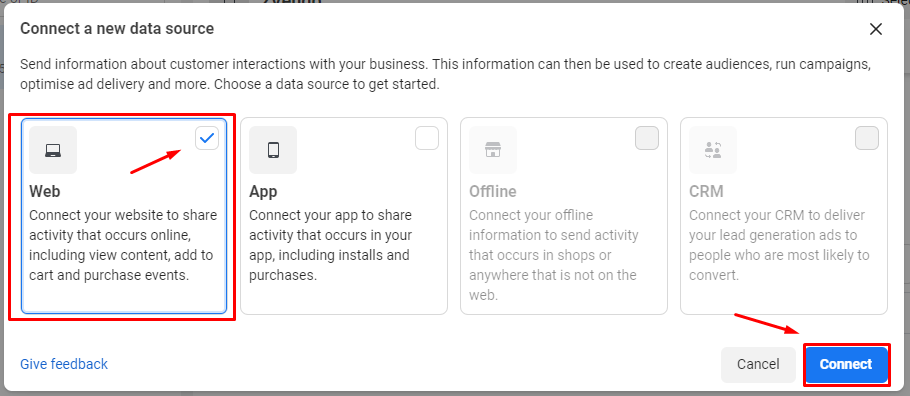
3. Select Facebook Pixel and click “Connect”.
![]()
4. Add your Pixel Name and then Enter your website URL to check for easy setup options.
6. Click “Continue”. As shown in the below picture.
![]()
Steps on Your Store Dashboard #
- From the navigation dashboard, click on “Store Configurations”
- Then, click on “Store Settings” and “Store Identity”.
- From Store Identity, you can add your Facebook Pixel ID by copying it and pasting it in the field shown in the picture below.
![]()
4. Scroll down till the end of the page, and click “Save Changes”.

Now you’re all set!
You now connected your online store with your Facebook marketplace.


