
Steps To Export The Template of the Bulk Upload Sheet #
To download or export the bulk sheet, check the below steps:
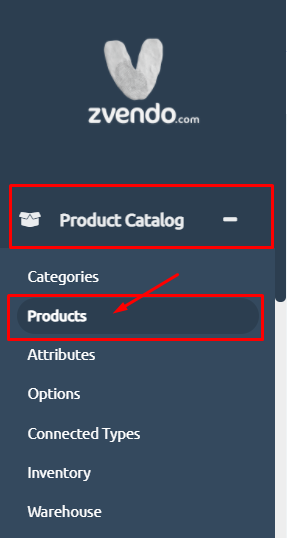
- From your store dashboard, click on “Product Catalog“
- Then, click on “Products“
3. Click on “Export“

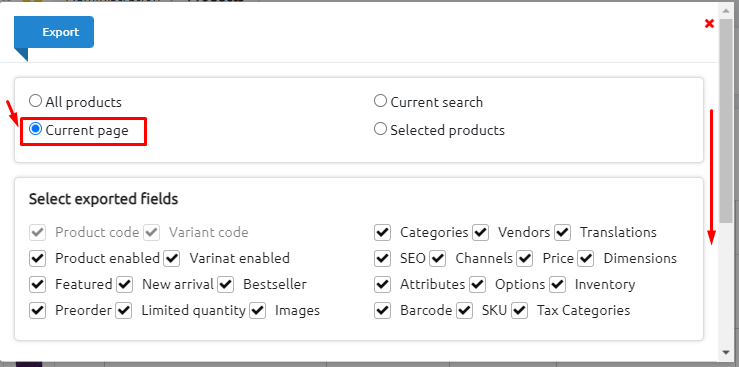
4. Then, a pop-up window will appear as shown in the below picture. Click on “Current Products“
Please Note:
You can select one product to export it and repeat the same sequence instead of exporting the full version.
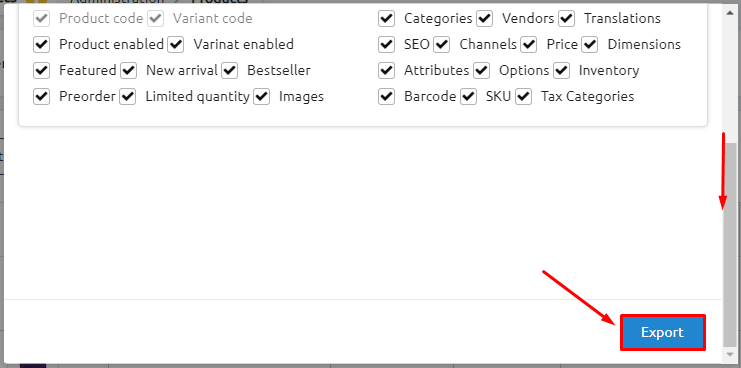
5. Scroll down and click on the “Export” button.
You always can get back to the latest version of the template sheet by following the below steps:
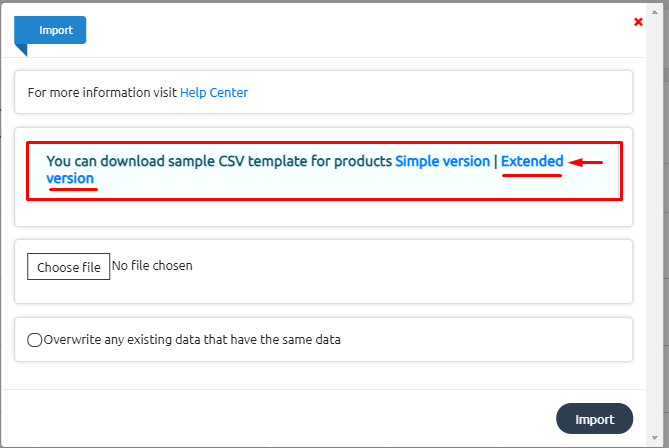
- From “Products“, click on “Import“.
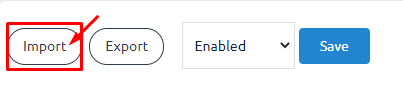
2. Clicking on “Extended Version” as shown in the below picture.
The Content Of The Bulk Upload Sheet #
Now, start filling in the details of your products, examples:
- Product Name
- Product Features
- Product descriptions
- Images
- Warehouse, and more…
Please note that you should fill in all the fields without spaces but instead use underscore (_) as shown in the below pictures.
Steps To Fill In The Sheet #
Demonstrated below is the detailed description of the products sheet with coloring codes.
Please Note:
The highlighted colors are for clarification and after filling in the details of your products, you should save the sheet with no formatting as a CSV.
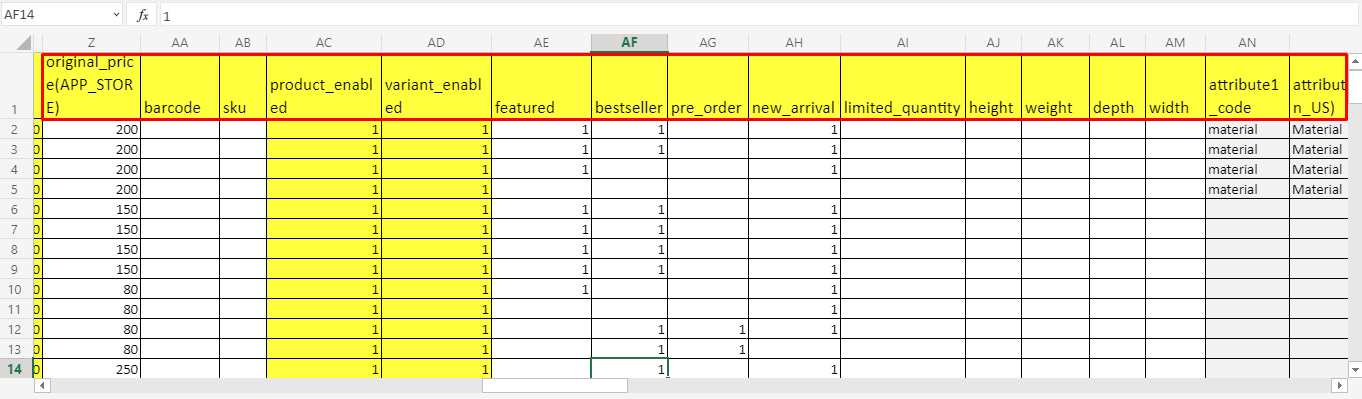
- Yellow Color represents the mandatory fields.
Example: (variant_code، product_code، main_category ، channels ، product_name(en_US) - White Color represents the fields that you can leave empty.
Example: categories - Grey Color represents the fields that will preferably fill in to provide more details about products to help customers make the purchase decision.
Example: product description
Explaining The Sheet Fields In Detail #
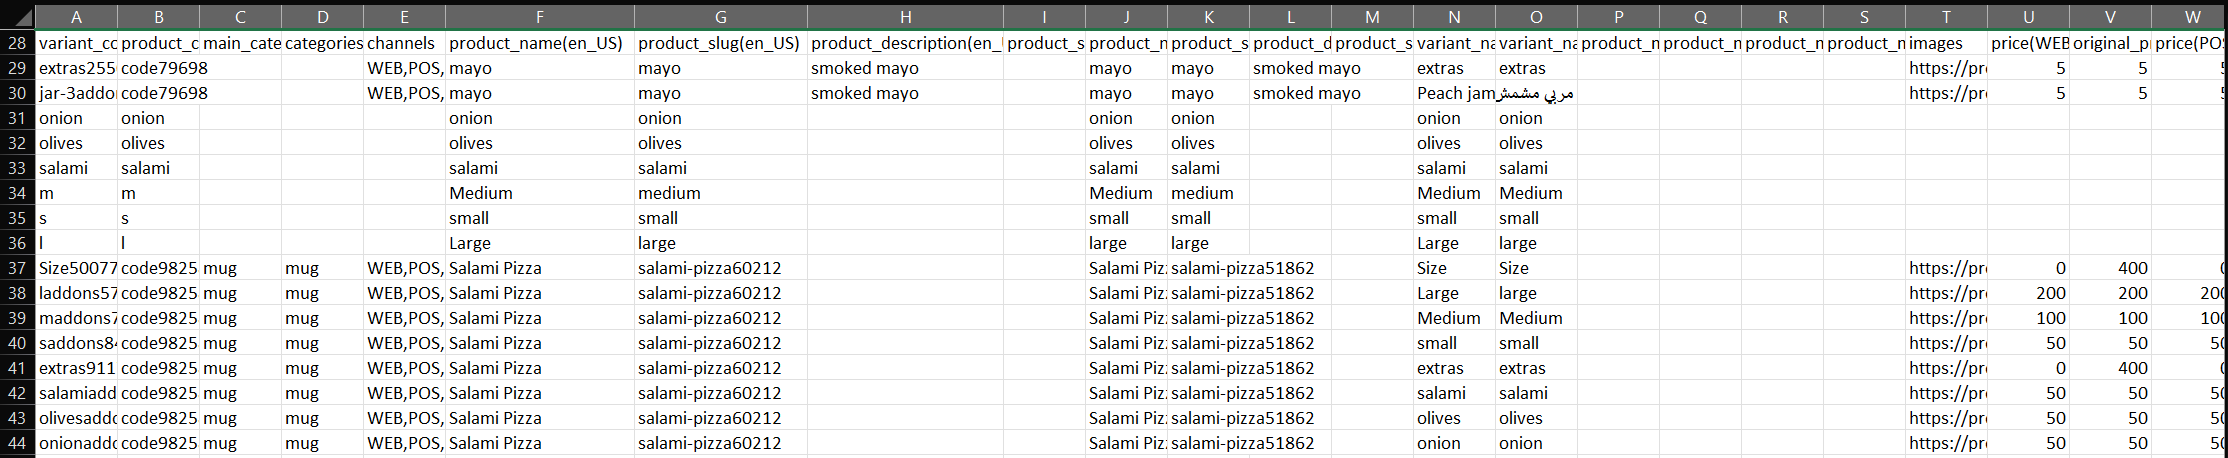
- How to type product “code”
*Code to be written in English alphanumeric characters and to separate between them use a dash –
*Examples on how to type codes: t-shirt1, t-shirt2, t-shirt3 - You can repeat the same code in the field of “variant_code”, and in the SKU field as shown in the below picture.
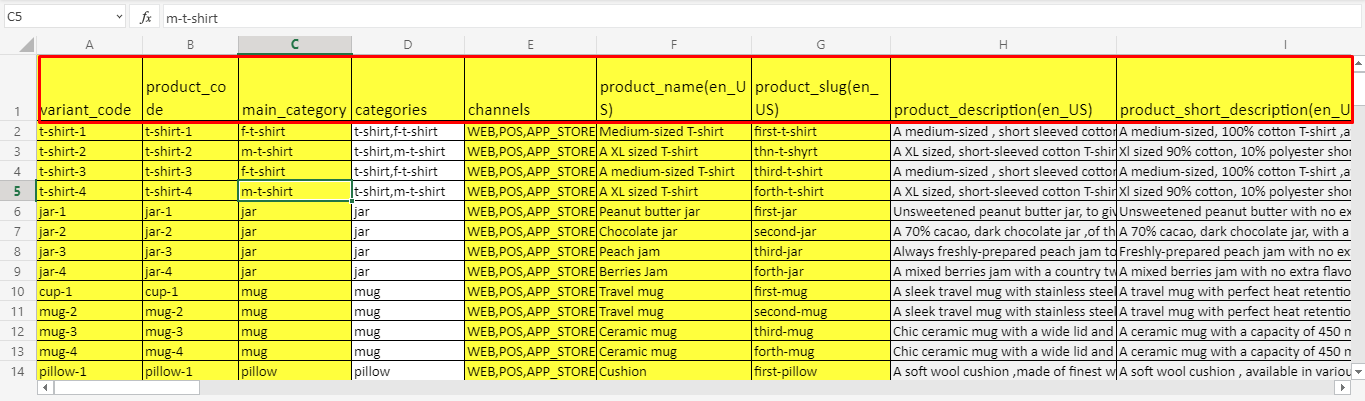
3. In the “product_description” field, write the specifications or give a description to clarify the details of your products.
4. Type the “product_name” in Arabic & English
5. Type the words that will be reflected on the product_slug or link to this product.
Note: *Any codes should be written as alphanumeric characters, and you can separate them with dash –
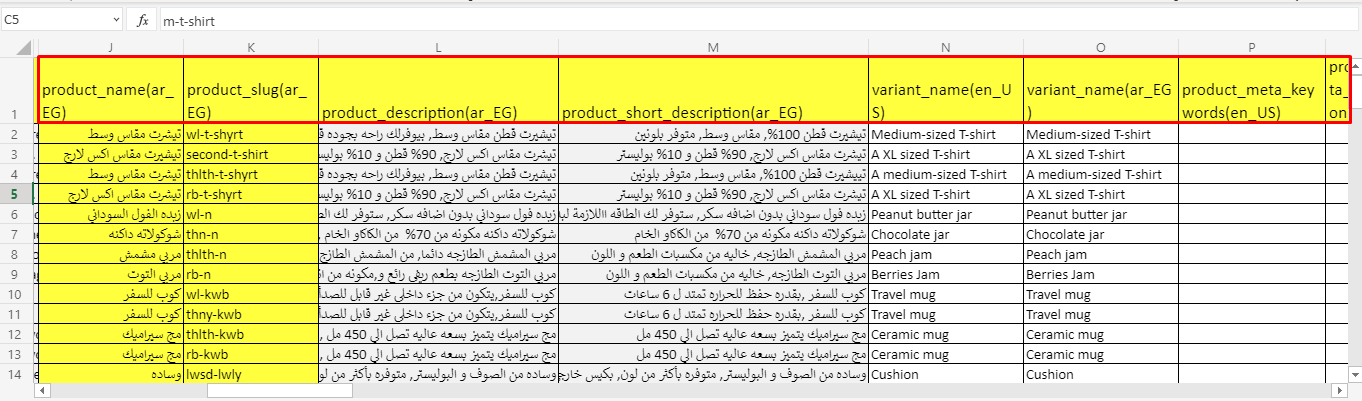
6. In the cell of product_description(ar_EG), type the Arabic product description.
7. In the cell of variant_name for highlighting the filters of your products like sizes or colors as shown in the below picture.
8. Now, add the image URL in the cell of images, as shown in the below picture.
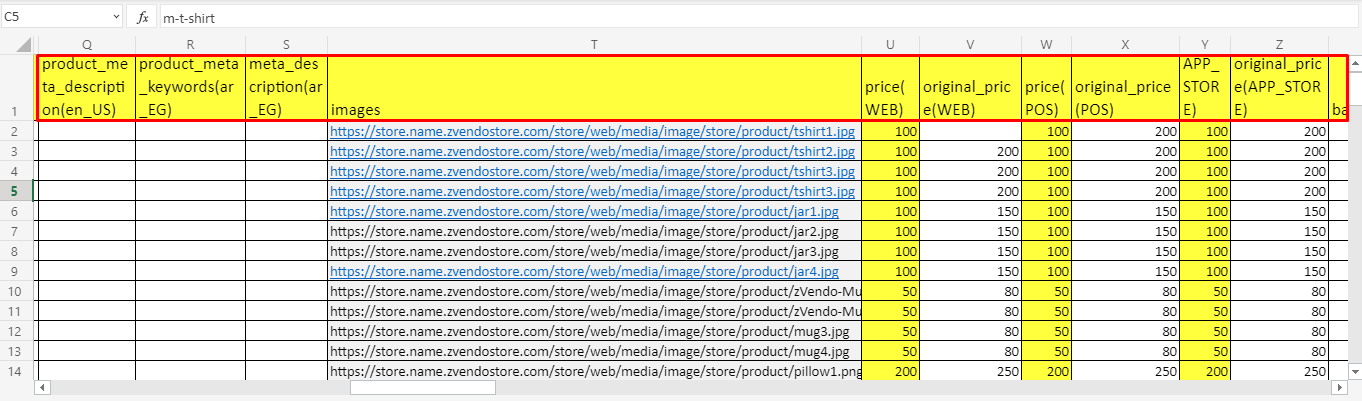
9. Then, start adding the prices of your products as shown in the below picture.
Highlighted Notes #
- You have to make sure that you add prices in the field name, price_(WEB)
- When you start offering your customers discounts, please make sure that the price in the cell named “original_price” is higher than the discounted price (example: Original price: EGP 200, discounted price: EGP 100).
- Then, you should add the unique barcode of this cell named, barcode.
- Fill in the cell named, SKU or stock keeping unit.
Please Note: If you don’t have a specific SKU, you can copy the same code in the product_code.
Steps to Adding Options, Variants, and Warehouse #
- If you have more than one option for the product like sizes, colors, or flavors, add one in the cell name, option1_code
- In the cell named, “variant_code”, add the code of the option, as shown in the below picture.
- Please note: If your product has multiple options like size and color, make sure you copy the six cells and change the number as shown in the below example:
- option2_code example: color2
- option_value_code example: color-2
- option_name(ar_EG) example: color
- option_name(en_US) example: لون
- option_value_name(ar_EG) example: أخضر
- option_value_name(en_US) example: green

4. In the cell named, warehouse1_code make sure you type the word “default“.
5. Then, enter the quantity of each item in the cell named, warehouse1_stock.
*For example: if you have 100 stock of the same t-shirt, type the number 100 in the cell.
6. In the cell named, tracked, enter one of these numbers: zero or one (0 or 1)
Please note:
- Typing 1 means that there is a stock of this product, and once all the stock is sold, there will be an “Out Of Stock” sign on the product page.
- Typing 0 means that the “Out of Stock” sign will not appear on the product page even if all your stock is sold. Hence, customers, in this case, can place orders for this item.

**NOTE**: Same steps are applied for add-on products. However, Variant name is where you add your add-on product options. Check the below screenshot…
Please Note:
- *Make sure you save the excel sheet as a CSV, UTF-8
- *If you can’t save the file in CSV, UTF-8, you can copy the data in Google spreadsheets then download it and the Arabic formatting will be automatically edited to the CSV formatting.
Now, you’re all set. Explore how to import your product data in bulk here.


