
Avoid delay and delivery hassle by enabling auto-detection on your store for your customers. This feature will allow end-users to pin their location on the map, and automatically link users to the correct branch.
How do you activate auto-detection on your storefront?
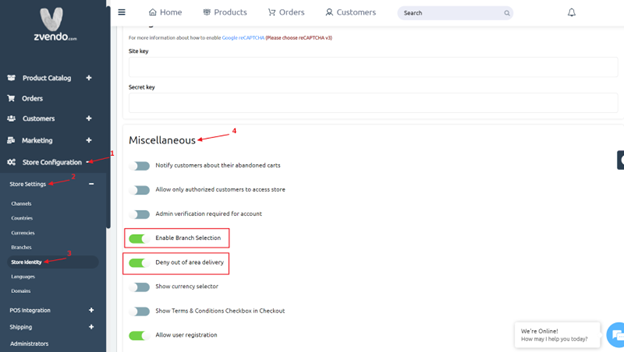
1- Login to your Dashboard
2- Go to store Configuration
3- Click store settings
4- Press store identity
5- Scroll down to miscellaneous, activate “Enable branch selection” and “Deny out of area delivery”
NOTE: once you press “Deny out of area delivery” you will see the below pop-up if you have missing geofence for one or more of your enabled areas…
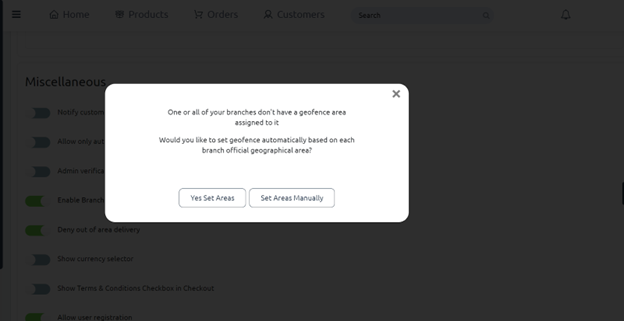
NOTE: “Set Areas Manually” option is preferred if you want to accurately define areas for a smoother delivery and accurate delivery fees.
A- if you press “Yes Set Areas”, the system will migrate zVendo fixed map that contains fixed coordinates to Egypt cities.
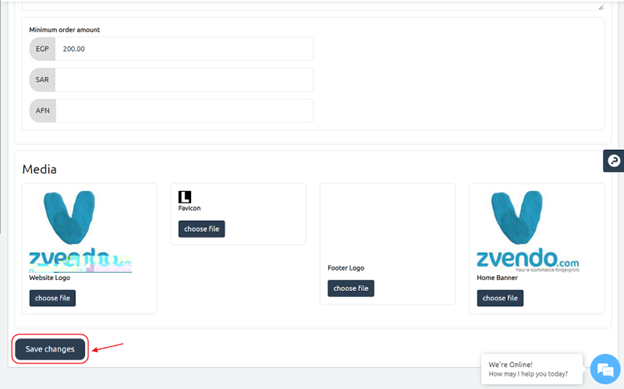
Scroll down on the store identity page and make sure to press Save Changes.
B- if you press “Set areas Manually”, you will be directed to the countries page to manually manage cities
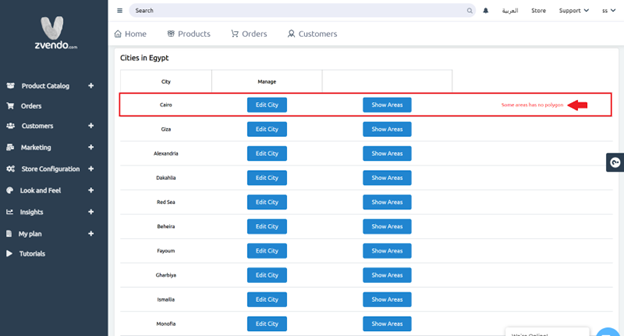
Here is how you manage cites…
1- Press “Manage Cities“. As shown in the below picture…

2- Choose the missing polygon city
3- Click Show Areas
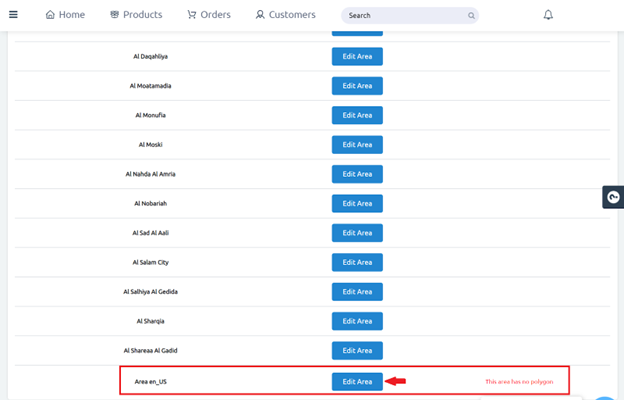
4- Select the missing polygon area. Then, click on Edit Area. As shown in the below picture…
6- Scroll down and start drawing your map. Check the picture below.
7- From the three icons, click on number 1 on the right shown in the below picture to “draw a shape” specific points.
8- Click on number 2, the pin icon to select a pin for your store location.
![]()
9- Make sure the start point is the endpoint. So draw the area specifying each point for the routes.
10- Press, “Save Changes“.
As shown in the below picture…

11- Once you are done with editing area, Go back to Store Configuration
12- Click Store Settings, Then Press Store Identity
13- Scroll down to miscellaneous and Make sure to activate “Enable branch selection” and “Deny out of area delivery”
14- Finally scroll down and press Save Changes


